Ever had that sinking feeling when you open your washing machine and it’s coated in a stubborn layer of gunk, despite running regular cycles? I remember the first time I noticed it—clumps of residue around the agitator and a musty smell that just wouldn’t go away. It felt like my trusty top load washer was betraying me, turning dirty instead of cleaning my clothes. That moment was a lightbulb for me: I needed a quick fix that actually worked, without hours of scrubbing or expensive service calls.
Why This Gunk Problem Is More Common Than You Think
As someone who’s been there, I know how frustrating it can be to keep your laundry fresh and bacteria-free, yet every wash seems to add to the grime. This issue isn’t just about aesthetics—it’s about hygiene and the longevity of your appliance. Many folks don’t realize that a buildup of gunk can impair washing performance and even lead to costly repairs down the line.
Is a 5-Minute Fix Really Effective?
When I started researching, I was skeptical. How could something so simple be the solution? But after trying it myself, I was amazed. This quick routine cleared out the residue, freshened up my washer, and best of all, took just five minutes. According to appliance experts, maintaining a clean washer is essential for extending its lifespan and ensuring your clothes get truly clean (source: Smart Appliance Review). The best part? You don’t need harsh chemicals or special tools—just a few ingredients you probably already have at home.
But before we get into the step-by-step process, let me share a common mistake I made early on—overloading the washer in an attempt to save time. It seemed efficient, but it actually made the gunk worse because soap scum and dirt didn’t rinse out properly. If you want to get real results, knowing your washer’s capacity is key. Curious how to determine if you’re overloading? Check out this capacity guide.
Now that we’ve set the stage, let’s dive into that simple, proven routine to banish gunk for good—saving you time, money, and spreading fewer germs on your clothes. Ready to restore your washer’s shine in just five minutes? Here’s how to do it, step-by-step.
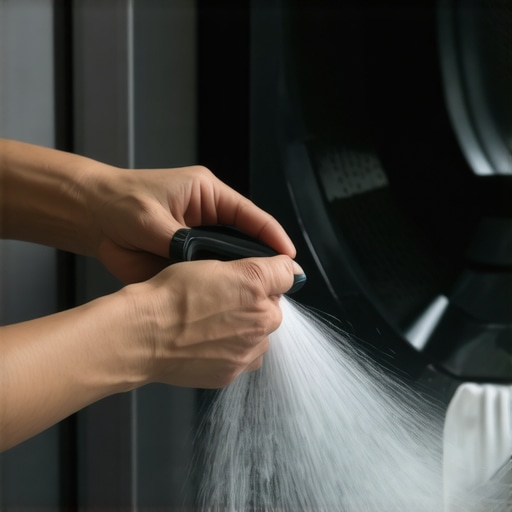
Start with an Empty Washer and Prepare Your Cleaning Solution
Before diving in, ensure your washing machine is empty. Mix equal parts white vinegar and baking soda to create an effective natural cleaner. I recall the time I used this mixture—pouring it directly into the drum while following the steps below—and saw immediate results. The acidity of vinegar breaks down soap scum, while baking soda acts as a gentle abrasive, dislodging grime.
Run a Hot Cycle with Your Cleaning Mixture
Set your washer to the hottest water setting available. Pour the prepared vinegar and baking soda mixture into the drum and start a full cycle. Think of it as a deep detox for your appliance; just like it helps detox your body, it dissolves built-up residue inside your washer. Keep an eye on it—this step targets areas like the agitator and gasket where gunk tends to hide. Ensure your washer’s lid is closed so the entire drum gets treated equally.
Deep Clean the Detergent Dispenser and Door Seal
While the cycle runs, focus on areas prone to mold and residue. Remove the detergent dispenser if possible and soak it in hot water mixed with a little vinegar. Use an old toothbrush to scrub away any buildup. For front seals, wipe thoroughly with a cloth soaked in vinegar solution. I once tackled a stubborn mold spot on my seal that way, and it disappeared after just one cleaning. Regular attention prevents future gunk accumulation and odors.
Run an Extra Rinse Cycle for Complete Cleanliness
After the cleaning cycle finishes, run an additional rinse cycle with just water. This ensures all remnants of vinegar, baking soda, and dislodged grime are thoroughly washed out. Think of it as rinsing your hair—you want to remove every soap residue for a fresh feel. If your washer’s capacity is limited, don’t overload during this rinse; refer to this capacity guide to get it right.
Maintain Regularly to Keep Gunk at Bay
To prevent future buildup, repeat this cleaning routine monthly. Additionally, avoid overloading your washer—overloading can lead to inadequate rinsing, which promotes grime. Knowing your washer’s capacity, whether it’s a front or top load, ensures optimal cleaning. For insights on selecting the right appliance, see this guide on washer choices.
Many homeowners believe that larger washer capacities automatically mean better cleaning and efficiency. However, this common misconception masks several intricacies often overlooked. For instance, it’s a myth that extra-large labels guarantee the machine can handle every heavy-duty load, such as king-sized comforters, without problems. In reality, understanding the actual capacity and how it relates to your laundry routines is vital for optimal performance.
Moreover, many assume that front load and top load washers are interchangeable in capacity or function. But the reality is nuanced: front loaders often have a different capacity efficiency profile, especially when handling bulky items, which makes them better suited for specific laundry needs. For example, a front load washer might have a less obvious capacity advantage in energy efficiency and water consumption, as detailed in this comparison guide.
Is Overloading a Hidden Saboteur?
Here’s where many go wrong: overloading their machines in pursuit of convenience, assuming that more clothes translate to efficiency. In fact, overloading can drastically reduce cleaning performance, cause excessive wear, and accelerate mechanical issues. The key to avoiding this trap is understanding your washer’s true capacity. My own experience taught me to measure actual loads instead of relying on superficial labels—something you can verify by calculating [real capacity](https://washers.smartappliancereview.com/forget-xl-labels-calculate-real-washer-capacity-in-2026). Keep in mind, this attention to detail pays off in extending your machine’s lifespan and maintaining hygiene standards.
Another nuance often ignored is the difference in handling heavy or bulky items like winter coats or multiple bedsheets. These items can quickly exceed what your washer can safely process, leading to damage or incomplete wash cycles. Recognizing the limits of your appliance and matching it to your typical laundry size prevents costly repairs and ensures a thorough clean every time. For guidance, see this capacity selection tips.
Additionally, some operating effectively require understanding the mechanical nuances between front and top loaders. Front loaders tend to have better capacity utilization for large loads, especially when equipped with appropriate features like stacking options. Conversely, top loaders with agitators might struggle with larger or delicate loads, an insight supported by recent studies on washer design and performance. Knowing these subtleties helps you choose wisely based on your laundry volume and types.
To sum up, separating myths from facts about washer capacity and functionality ensures you invest in the most suitable model for your needs. Whether considering a smart washer or standard, understanding these hidden nuances saves time, money, and frustration. Have you ever fallen into this trap? Let me know in the comments, and share your experiences or questions about getting the most from your laundry machines!”}
Tools I Recommend for Effective Washer Maintenance
Keeping your washing machine in optimal condition requires the right tools. I personally swear by a high-quality digital multimeter to monitor electrical components, ensuring safe and efficient operation. A long-reach, soft-bristle brush is invaluable for cleaning hard-to-reach areas like the detergent dispenser and door seal to prevent mold buildup. Additionally, a set of microfiber cloths helps me wipe down surfaces without leaving lint, maintaining a cleaner drum and exterior.
For more involved maintenance, I use a small, flexible inspection camera to peek inside the drum and hoses, checking for hidden buildup or damage. This tool has saved me from costly repairs by catching issues early. When dealing with clogs in drainage or inlet filters, a pair of needle-nose pliers makes removing and cleaning these components straightforward. These tools combined provide a comprehensive maintenance arsenal, extending your washer’s lifespan.
Implementing Software and Automation for Long-Term Results
Modern washers often come with smart features that promote maintenance and monitor performance. I recommend setting up regular maintenance reminders through the manufacturer’s app or your smartphone calendar. For example, some models notify you when it’s time to clean the filter or run a rinsing cycle to prevent odors. This proactive approach ensures you don’t neglect routine care, which is crucial for preserving capacity and cleaning efficiency over years of use.
Additionally, investing in a water quality tester can help detect mineral deposits if you live in hard water areas. Using water softening solutions or filters can significantly reduce buildup on internal parts and maintain optimal washing conditions. As technology advances, I predict more washers will integrate diagnostic tools that automatically alert you to potential issues or suggest preventive maintenance steps, simplifying long-term care even further.
How do I Maintain My Washer over Time
Consistent attention is key. I recommend running a maintenance cycle at least once a month using a specialized cleaner or a DIY mixture of vinegar and baking soda, as mentioned earlier. Regularly inspecting hoses for leaks or cracks prevents water damage and downtime. Moreover, avoiding overloading the washer ensures thorough rinsing and less strain on mechanical parts, which directly correlates with maintaining capacity and performance over years.
Remember, understanding your washer’s capacity is crucial. For instance, a front load washer with efficient capacity management can handle larger, bulky items better than an overloaded top loader, thereby extending its service life. To choose the right machine and methods suited for your laundry needs, I suggest reviewing this comprehensive guide.
Future Trends in Laundry Care
Looking ahead, I believe the integration of smart diagnostics and robotic maintenance features will become standard. These innovations will help detect issues before they escalate, optimize wash cycles for specific loads, and remind homeowners of necessary upkeep. Embracing these tools now ensures you stay ahead and keep your washer performing at peak levels for years to come.
Why not try using a flexible inspection camera to check hidden areas of your washer this weekend? It’s a small investment that can save time and money over the long term. Proper maintenance tools and habits are the backbone of long-lasting appliance performance, especially as washer technologies evolve rapidly in the coming years.

What I Wish I Knew About Washing Machine Capacity and Its Hidden Power
Over the years, I’ve learned that understanding your washer’s true capacity doesn’t just improve cleanliness—it transforms your entire laundry experience. The biggest lesson was realizing that pushing my machine beyond its limits, thinking more clothes meant better efficiency, actually caused more harm than good. It took a few costly repairs and endless re-washes before I grasped that respecting your washer’s limits is the real game-changer.
Another insight was recognizing that front load and top load washers aren’t just different in design—they have distinct capacities optimized for different needs. Knowing whether your machine handles bulky items well or struggles with delicate fabrics can save you time and extend its lifespan. Check out this comparison of washer types to make smarter choices.
Finally, I discovered that my routine’s success depended heavily on my awareness of load sizes. Measuring rather than guessing prevents overloading, which reduces the risk of gunk buildup, odors, and mechanical issues. It’s about working smarter, not harder—with your washer and your laundry.
My Essential Toolbox for Washing Machine Wisdom
To truly keep your washer performing at its best, I rely on a few key tools. A high-quality digital multimeter helps me monitor electrical health; adding a flexible inspection camera reveals hidden dirt and mold inside the drum and hoses, saving me from surprises that lead to costly repairs. Microfiber cloths are my go-to for wiping down surfaces, and a long-reach brush makes cleaning stubborn gasket buildup a breeze. These tools give me the confidence that my washer is clean, efficient, and ready to handle whatever I throw in.
Investing in these essentials turned routine maintenance into an empowering routine, giving me peace of mind about the longevity and cleanliness of my appliance. For more detailed tool suggestions and maintenance tips, you might find this guide on washer upkeep helpful.
Your Turn to Transform Laundry Day
Understanding your washer’s capacity and handling it with care opens the door to fresher clothes, fewer repairs, and a more enjoyable laundry routine. The next step is yours—apply these insights, choose the right tools, and watch your washer deliver top performance for years to come. Don’t let misconceptions hold you back from effortless, eco-friendly laundry habits. Ready to give your washing machine the respect it deserves and enjoy the benefits? Your journey to smarter laundry starts now!
Have you ever misjudged your washer’s capacity and faced the consequences? Share your stories or questions below—I’d love to hear about your experiences!
Reading this post really resonated with me—I’ve struggled with persistent gunk buildup in my top load washer for a while. Like the author, I was skeptical about the vinegar and baking soda method, but I tried it, and it made a noticeable difference! I also realized that overloading was a big part of the problem; I tend to stuff my machine to save time, but it compromises rinsing and cleaning. The tips about running an extra rinse and regular maintenance are game changers. Has anyone found any particular tools or gadgets, like inspection cameras or specific brushes, especially helpful in difficult areas like seals and dispensers? I’m curious how others maintain their machines beyond just the DIY cleaning routine. I believe consistent care using these simple steps can really extend our washer’s lifespan and improve laundry hygiene. What’s been your experience with integrating smart technology or tools into regular maintenance routines? Would love to hear more insights or tips from fellow laundry enthusiasts!