That frustrating moment when your top load washer suddenly leaks or stops draining right in the middle of a cycle. I remember the first time it happened to me—I was soaking wet, staring at the puddle spreading across my laundry room floor. It was a lightbulb moment that made me realize I’d overlooked something crucial about my machine’s compatibility with HE (High Efficiency) detergent pods. It’s surprising how many of us dive into upgrading or replacing appliances without fully understanding how newer detergent types and washer designs interact—and the consequences can be costly and messy.
The Common Culprit: Understanding Washer Failures in 2026
In recent years, many homeowners have noticed their top load washers from 2026 failing prematurely. These failures often relate directly to the use of HE pods, a popular choice for their convenience and low waste. But what’s the real story behind these failures? The crux lies in the design evolution of these machines and how they handle detergent and water flow. When HE pods’re used improperly—like putting them in the wrong dispenser or overloading your washer—it can lead to buildup, overflows, or even prevent proper drainage.
Early on, I made a mistake by assuming that all washing machines handle HE pods the same way. I didn’t realize that some models, especially the top load variety, need specific guidance for optimal performance. That oversight led to clogged gaskets and smelly washers—issues I eventually learned could’ve been avoided with proper use and maintenance. Want to learn how to sidestep these common pitfalls? Keep reading because we’re about to dig into practical advice, backed by research and real-life experience, to help you avoid costly repairs and keep your laundry routine running smoothly.
Is the Hype Around HE Pods Actually Worth It?
Many skeptics worry that HE pods might cause more harm than good, leading to clogged dispensers or inefficient cleaning. I used to think they were just a marketing gimmick—until my own washer started acting up after a few months. It turns out that improper use is often the real culprit. If you’re concerned about whether your machine is compatible or if you’re using the right technique, consider reviewing the manufacturer’s instructions carefully. For detailed troubleshooting tips, you can check out this resource on overfilling issues. Knowing the right way to handle HE pods can help you avoid repeat problems and extend your washer’s lifespan.
Stay tuned as we unpack some simple, effective steps you can take today to prevent these common failures. You don’t have to accept persistent washer problems as just part of life—there’s plenty you can do to keep your laundry routine running smoothly and avoid avoidable repairs.
Assess Your Washer’s Capacity First
Before loading your machine, verify its capacity. Overloading is a common mistake that causes drainage problems and leaks. Measure your laundry pile — a typical top load washer handles between 3.5 to 4.5 cubic feet of laundry comfortably. For large items like king-size comforters, consult your washer’s manual or check a capacity guide to prevent overloading, which can strain the drum and cause leaks.
Sort Laundry Effectively
Proper sorting ensures even distribution in the drum, reducing the risk of unbalanced loads that can vibrate and trigger leaks. Separate heavy items from delicate ones. For instance, avoid mixing heavy blankets with lightweight clothing. An unbalanced load can also stress suspension rods, especially in older models, leading to leaks or damage. For tips on balancing, see these balancing techniques.
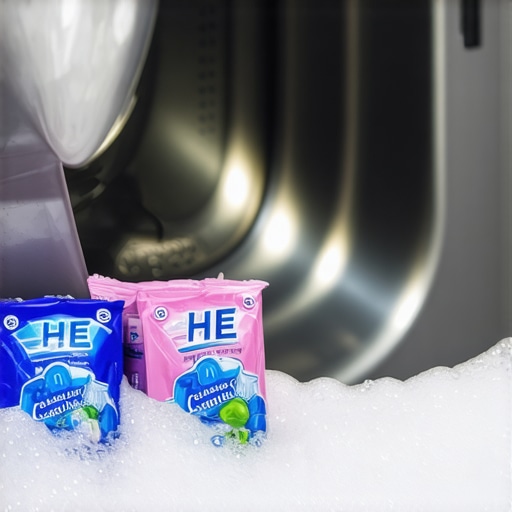
Use Detergents Correctly
High-efficiency (HE) detergent pods are designed for specific water levels. Place pods directly into the wash tub before adding clothes, not into the dispenser drawer, to prevent buildup that can clog drainage systems. When using pods, stick to the recommended amount to avoid excess suds that overflow the gasket and cause leaks. Check your manufacturer’s instructions or review common errors at this troubleshooting guide.
Maintain the Gasket and Drain System
Cleaning the gasket prevents mold, debris, and detergent buildup that can block water flow. Regularly inspect the rubber seal around the door or lid—especially in front load models but also relevant in some top loaders. For stubborn mold or residue, use a mixture of vinegar and baking soda instead of harsh chemicals. Also, clear out the drain pump filter periodically. For detailed cleaning steps, refer to these maintenance tips.
Balance the Load Carefully
Uneven distribution causes the drum to shake excessively, straining hoses and seals. When loading, distribute clothes evenly around the central agitator or drum. For example, if you’re washing multiple towels and jeans, arrange them so that weight is spread equally on all sides. During spin cycles, keep an eye out for excessive vibration—immediately stop and redistribute if needed. To reduce vibrations and protect against leaks, see these vibration reduction techniques.
Handle Heavy Items with Care
Washing bulky or heavy items like comforters or blankets can overload your washer if not done properly. Check your machine’s capacity for such items—many models have specific load limits. When washing large items, consider doing multiple smaller loads to avoid stressing the suspension. This prevents undue pressure on seals and hoses, reducing leak risk. For guidance on heavy loads, explore this article.
Regular Inspection Pays Off
A proactive approach involves checking hoses, seals, and gaskets regularly. Look for cracks, wear, or loose fittings—address issues immediately to prevent leaks. When inspecting, turn off the water supply and unplug the machine to avoid accidents. Replace worn hoses or seals promptly. Also, ensure the drain hose is free of kinks and clogs, which can cause drainage backups and leaks. For detailed inspection routines, see this maintenance checklist.
Test Your Load Capacity
To ensure your washer isn’t overloaded, perform a simple test: fill a laundry basket with the typical amount of clothes you plan to wash and compare it to the washer’s capacity. Practice helps you develop a feel for optimal loads and prevents overstuffing, which can lead to leaks or damaged parts. For a detailed test and real-world examples, see this load capacity test.
Many homeowners assume that washer capacity is straightforward—bigger is always better. However, this common misconception can lead to inefficient washing and even damage your machine. For instance, buying a model with a large drum under the assumption it will handle any load can backfire; overloading small-capacity washers causes excessive wear, while oversized models may not be energy efficient if used improperly. The real nuance lies in understanding your typical laundry load size and choosing a washer tailored to those needs, rather than simply opting for the largest capacity available. Experts recommend referring to guides like this comparison of front-load versus top-load capacities to make informed decisions. Many believe that front load washers always provide better capacity, but this isn’t universally true; some top load models offer comparable or even superior capacity without sacrificing convenience. A prevalent trap is assuming that all washers labeled with a capacity number truly accommodate those sizes in real-world scenarios. The difference between stated liters or cubic feet and practical load handling is often overlooked, leading to overloading or underutilizing your machine’s potential. Furthermore, many forget that washer capacity isn’t just about volume—it’s about how well the machine distributes weight and handles bulky items. For example, washing king-size comforters or multiple heavy towels requires a machine designed to manage such loads without excessive vibration or leaks. Advanced users should consider not just capacity but also how different models handle high-weight loads, as detailed in this testing of smart washers. Additionally, misconceptions about washing cycles can exacerbate capacity issues; overloading during delicate cycles may cause fabric damage, while underloading can waste water and energy. Remember, optimal performance depends on matching your laundry habits with suitable washer features. Now, here’s a critical insight many overlook: the capacity stated on the label often assumes ideal conditions—such as light loads and proper distribution. In practice, exceeding or even approaching those limits can reduce cleaning efficiency and accelerate wear. So, the key is to balance your regular laundry size with an appropriately rated washer to maximize longevity and cleanliness. The next step is to evaluate your actual washing needs and select a model that offers real-world capacity suited for your household. Have you ever fallen into this trap? Let me know in the comments.
How do I maintain my washing machine over time?
Ensuring your laundry workhorse remains reliable requires more than just occasional cleaning. I personally rely on a combination of high-quality maintenance tools and smart routines to extend the lifespan of my washer. A key piece of equipment I swear by is a digital multimeter—this allows me to check electrical components like thermostats and motor circuits quickly, diagnosing potential issues before they cause breakdowns. Having a reliable multimeter at hand means I can catch wiring problems early, preventing costly repairs down the line.
Another essential is a professional-grade cleaning brush set designed specifically for gasket and filter maintenance. Regularly removing debris, detergent residue, and mold from areas like the door seal or drain filter keeps my washer smelling fresh and ensures optimal water flow, reducing the risk of leaks. I also recommend investing in a portable ultrasonic cleaner for cleaning small parts like inlet valves or sensors, especially if you notice persistent inefficiencies—this method is gentle yet highly effective at removing stubborn grime.
Software tools also play an increasing role in maintenance. I use a smartphone app that can connect to some modern washers via Wi-Fi, providing real-time diagnostics and maintenance alerts. This proactive approach lets me schedule repairs at the earliest sign of trouble, avoiding emergency breakdowns during busy weeks.
Looking ahead, I predict smart diagnostic tools integrated with AI will become standard, allowing even novices to troubleshoot and fix issues at home with minimal effort. Manufacturers are increasingly designing washers with self-diagnosis features that inform you exactly what needs attention, which I believe will make long-term maintenance more accessible and less intimidating.
For those wanting to take their maintenance game up a notch, I highly recommend trying out a chemical cleaning solution like affresh or vinegar-based rinses combined with these tools. Regularly running a cleaning cycle with these agents, especially after heavy loads or bulky items, will prevent buildup that causes leaks or odor.
Why is routine inspection crucial for longevity?
Regularly inspecting hoses, seals, and the drum’s interior saves money and hassle. I schedule bi-monthly checks, which involve simple tasks like tightening fittings, looking for cracks, and cleaning lint and debris from crevices. Using a flashlight, I inspect the drain pump filter and replace worn hoses before they rupture. This routine has saved me from unexpected water damage more times than I can count.
If you notice persistent problems such as leaks or strange noises, don’t delay—invest in a quality inspection kit or hire a professional if needed. Over time, these simple acts significantly postpone or even eliminate costly repairs, keeping your washing machine dependable for years.
Remember, early detection is essential. With tools like a multimeter, gasket brush, and smart diagnostics, you can confidently manage your washer’s health. As technology advances, I recommend staying informed about new maintenance gadgets—like sensor cleaning stations or AI-powered monitoring systems—that streamline the process. Embrace these tools today, and you’ll enjoy cleaner clothes and fewer surprises tomorrow, ultimately saving money and extending your machine’s service life. For example, integrating a sensor-cleaning device with your washer can reduce detergent residue buildup, a common cause of drainage issues, as detailed in this guide. Give one of these advanced tips a try, and experience how small upgrades can make a big difference in your laundry routine.
The Hardest Lesson I Learned About Top Load Washers and Capacity
One of my biggest surprises was realizing that overloading my washer not only caused leaks but also shortened its lifespan. I used to think bigger loads meant more efficiency, but I learned the hard way that respecting capacity limits and load balancing is crucial. This lesson reminded me that understanding my specific washer’s capabilities can prevent costly repairs and ensure cleaner laundry every time.
My Go-To Resources for Keeping My Washer Running Smoothly
I’ve relied heavily on guidebooks like this capacity comparison guide to select washers suited for my needs. Additionally, I trust manufacturer manuals for model-specific advice and troubleshooting articles that help me resolve issues promptly. These resources keep me informed and confident in my washer maintenance routine.
Your Turn to Make Laundry Easier and Smarter
Taking care of your top load washer isn’t just about fixing problems—it’s about adopting proactive habits that extend its life and improve your laundry results. Embrace the routine checks, load the machine wisely, and stay informed about your appliance’s needs. Remember, a well-maintained washer is the backbone of hassle-free laundry days. So, what small change will you try today to better care for your washer? Share your plans and join the conversation below!
,