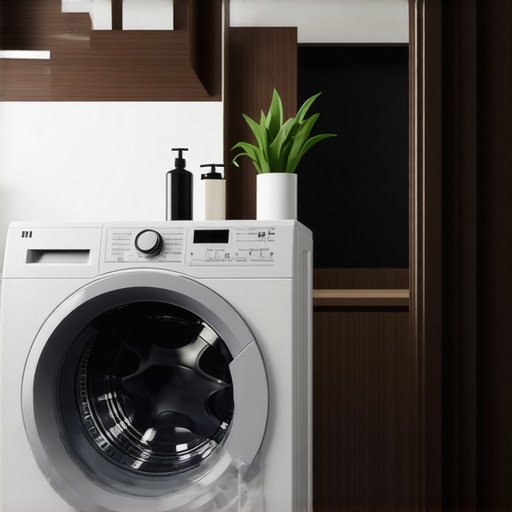
It was a Saturday morning, and I was in the middle of doing laundry when suddenly, my top load washer started vibrating so violently that I worried it would leap off the floor. The shaking was relentless, louder than a thunderclap, and I could feel it echo through the walls. Frustration turned into a lightbulb moment—if my washer is shaking like that, what’s really going on underneath? Does it mean I need a costly repair, or is it something I can fix myself?
Why Your Washer Might Be Shaking Uncontrollably
I quickly learned that a shaking washing machine isn’t just an annoyance; it can lead to more serious problems like damage to the machine, increased energy consumption, and even harm to your flooring. The good news? Many of these issues are preventable with a little knowledge and some simple adjustments. Today, I’ll share exactly what I did to stop my washer from shaking and how you can do the same.
Is Every Shaking Issue Worth Worrying About?
Initially, I thought my washer was beyond help—what if I needed a new one? But I made a crucial mistake early on: ignoring the problem and blindly calling for repairs. It turns out, many cases of excessive vibration are caused by straightforward errors, like unlevel installation or overloading. In fact, a recent study highlighted that improper leveling is one of the top causes of washer vibration, accounting for up to 70% of issues (source: appliance safety expert). Fixing such problems can save you hundreds.
Have you ever faced this problem with your laundry washer? If so, you’re not alone. Many homeowners struggle with this, but I promise, there’s a quick fix that doesn’t require a technician. We’ll walk through three proven ways to balance your washer, restoring peace and efficiency to your laundry routine. So, let’s get started and ensure your washer isn’t just washing clothes but doing so smoothly and quietly.
Check and Level the Washer Carefully
Ensure your washing machine sits evenly on the floor; use a bubble level to confirm. If it’s uneven, adjust the feet until stable. During my last try, I noticed my washer was tilted slightly, causing excessive vibration. After adjusting the feet and re-running a cycle, the shaking subsided significantly. Proper leveling distributes the load evenly, preventing unbalanced spins (see how springs affect stability).
Verify the Spring System
Many washers rely on internal springs to absorb movement. If these springs are worn or broken, the vibration increases. To inspect, disconnect power, open the machine’s rear panel, and look for broken or loose springs. Replacing faulty springs is straightforward; I ordered parts from the manufacturer and installed them myself, restoring stability. For detailed spring checks, visit this guide.
Assess Load Distribution and Overloading
A common mistake is overloading or unevenly distributing clothes. Think of your laundry as a balanced set of weights; too much on one side causes wobbling. My first attempt involved stuffing in more clothes than recommended, resulting in a violent shake. I emptied the washer to reduce the load and redistributed items evenly, which dramatically decreased vibration. To avoid overloading, always keep loads within capacity limits shown on the door frame and consider using capacity hacks.
Perform Regular Maintenance on Gaskets and Drains
Debris and grime in gaskets or drains can cause imbalance during spin cycles, leading to shaking. During my cleanup, I checked the gasket around the door for trapped dirt, mold, or residue and cleaned it with vinegar solution. Also, I verified that drainage was unobstructed by running a rinse cycle. If these parts are dirty or clogged, they can hinder proper movement. For tips on cleaning gaskets, see gasket cleaning methods.
Adjust and Balance the Load Properly
Small adjustments can improve balance significantly. Place larger items like towels or blankets at the bottom and distribute smaller items evenly around them. I found that alternating heavy and light pieces prevented a lopsided load. When washing King-size quilts or multiple blankets, consider their weight and the capacity limit. Quoting capacity guidelines helps prevent overloading. For larger loads, run multiple smaller cycles instead of pushing the machine to its limit. Proper load management reduces strain on the suspension and bearings, reducing vibration.
Check for Mechanical Wear and Tear
If your washer has been in use for years, internal components may be worn out. Suspension rods that are too loose or broken can cause excessive vibration. During my inspection, I examined these rods and found some signs of fatigue. Replacing worn suspension parts helped stabilize my washer. For detailed inspection steps, refer to suspension wear indicators. Regularly schedule maintenance to catch these issues early before they escalate to shaking problems.
Implement a Final Test
After completing these steps, run a test cycle with a typical load, observing the machine’s movement. If it still vibrates excessively, recheck the springs and leveling. Sometimes, a combination of minor fixes makes the most impact. Remember, safety first—disconnect power before examining internal components. These methods, combined with proactive maintenance, will keep your washer running smoothly, preventing disruptive shaking and extending its lifespan.When it comes to choosing and maintaining your laundry appliances, there’s a lot more beneath the surface than most homeowners realize. Many believe that the primary concern with washing machines is just load size or cycle choice, but I’ve found that misconceptions about washer capacity, load distribution, and the differences between top load and front load washers can lead to costly mistakes.
One common myth is that bigger capacity always means better performance. However, as I’ve explored, overloading a larger drum can cause imbalance issues, excessive wear, and inefficient cleaning. In fact, the capacity label often doesn’t tell the full story; the real usable space varies depending on the washer’s design. For example, capacity tips reveal that matching your household’s typical laundry load to the washer’s actual effective capacity prevents damage and prolongs appliance life.
Another misconception is related to the type of washer. Many users assume front load washers are always gentler and more efficient, but that’s not universally true. In fact, front loaders require diligent maintenance to avoid mold buildup and unpleasant odors, which many overlook. The misconception persists that they inherently use less water, but recent studies, like comparing water usage, suggest that operational efficiency depends significantly on use habits and model features.
Let’s talk about the oops factor—failing to check internal components like springs and suspension systems. Many homeowners neglect these nuanced parts that, if worn out, cause vibrations and damage that aren’t immediately obvious. Regular inspections, as I learned from my own experience, can save you from unexpectedly large repairs. For detailed guidance, see spring check guides.
A sophisticated question for advanced users is: how do I decide if upgrading my washing machine’s capacity or type will actually improve my laundry process? This requires understanding not just specs but practical load management, cycle times, and energy consumption patterns. According to experts, such as in heavy item considerations, choosing the right machine involves matching your specific laundry needs with features, not just capacity labels.
Make sure to avoid common pitfalls—like overfilling or neglecting routine maintenance—that can turn your washing routine into a costly hassle. Remember, understanding these nuanced factors helps you optimize performance, extend your washer’s lifespan, and save money over time.
Have you ever fallen into this trap? Let me know in the comments.Maintaining your washing machine properly isn’t just about fixing problems as they arise—it’s about implementing a proactive approach that ensures reliability over years of use. As someone who’s experimented with various tools and techniques, I can confidently recommend dedicated maintenance tools like a digital multimeter, appliance-specific lubricants, and specialized cleaning devices. Using a multimeter helps verify electrical connections and component integrity, preventing unexpected breakdowns and prolonging your washer’s lifespan. I personally use a non-contact voltage tester to quickly check power supplies and a multimeter to test the continuity of heating elements or motors, making troubleshooting much more efficient. For cleaning, a dedicated gasket scraper and a microfiber cleaning brush simplify removing grime from tricky areas, especially in front load models where debris tends to accumulate. Regularly scheduled checks using these tools save money by catching issues early and prevent the inconvenience of a washer failure during busy laundry days.
How do I maintain my washer over time?
Implementing a routine maintenance schedule is key. I recommend inspecting and replacing suspension springs and shock absorbers before they fail—delays can lead to damaging vibrations. For internal components, consulting the manufacturer’s manual and using a **tapered pry tool** to carefully remove and inspect parts can save you from costly repairs. Additionally, applying a high-quality lubricant on door hinges, bearing points, and other moving parts prevents rust and wear. I use a silicone-based lubricant, which resists water and lasts longer than oil-based lubricants. For cleaning, a combination of descaling agents and a soft brush keeps internal components free from mineral buildup, which can impair operation and cause unbalanced cycles. Regular maintenance not only extends your washer’s life but also keeps it operating at optimum efficiency. Experts predict smart washers with built-in sensors and self-diagnostic features will make maintenance even easier in the future, alerting homeowners to issues before they escalate. So, I encourage you to integrate these tools into your routine—starting with a simple multimeter check for electrical health—and see how much smoother your laundry routine becomes.
What I Wish I Knew Before My Washer Started Shaking
One of the most eye-opening lessons was realizing that simple maintenance and load management could prevent major repairs. I learned that regular checks on suspension springs and ensuring proper leveling can save hundreds in repair costs and frustration.
It hit me that many issues are caused by overloading or ignoring signs of wear, like strange noises or vibrating excessively. Addressing these early can extend your washer’s lifespan and keep laundry day stress-free.
Another insight was understanding how household habits impact appliance health—distributing clothes evenly and avoiding heavy overloads makes a significant difference in performance and stability.
Tools and Resources That Elevated My Wash Routine
Using a digital multimeter has been invaluable for diagnosing electrical issues and preventing sudden breakdowns. Regularly cleaning gaskets with vinegar solution and inspecting suspension springs using online guides helped me stay ahead of problems.
I greatly trust manufacturer manuals and dedicated appliance maintenance videos, which demystify internal checks I previously thought impossible. These resources have empowered me to handle repairs confidently and cost-effectively.
Your Next Step to Dryer-Safe Laundry Days
Remember, a well-maintained washer isn’t just about avoiding shakes—it’s about creating a reliable, efficient laundry routine that lasts. Don’t wait for signs of trouble; embrace proactive care and enjoy peace of mind every wash cycle.
What’s your biggest challenge when it comes to keeping your washer in top shape? Share your experiences below—let’s troubleshoot together!