I’ll never forget the day I pulled open my front load washer, expecting a quick spin cycle, only to be greeted by a suddenly rattling drum and the unsettling feeling that my laundry day was about to turn into a repair nightmare. That lightbulb moment made me realize: if I didn’t fix this drum looseness fast, I might be facing more costly repairs or even a total replacement. Sound familiar? You’re not alone.
Why a Loose Drum Can Spell Big Trouble for Your Laundry Routine
Understanding what’s happening inside your washing machine isn’t just about fixing noise — it impacts performance, longevity, and even safety. A loose drum can lead to uneven washes, increased vibrations, and even damage to your machine’s internal parts. What’s alarming is that many folks overlook this small problem until it turns into a big, costly repair. The good news? With a simple, inexpensive fix, you can secure that drum and save yourself a ton of hassle and money.
Could This Tiny Fix Really Save You Hundreds?
Absolutely. Early in my own experience, I made the mistake of ignoring the problem, thinking it was just a momentary oddity. But neglecting it only worsened the situation, leading to a costly replacement that could have been prevented. According to appliance experts, a loose drum is often due to a worn or damaged drum support or snubber rings — components that can be replaced easily if caught early. Trust me, a quick fix costing less than five dollars can be a game changer.
If you’re wondering how to tell if your washer’s drum is loose, pay attention to unusual noises during operation, excessive vibration, or if the drum wobbles when you push it by hand. These signs are red flags that shouldn’t be ignored. Fortunately, I’ll walk you through exactly how to fix this common issue with minimal tools and a little elbow grease. Ready to get your washer back in shape? Let’s dive into the step-by-step solutions that will make you feel like a pro.
Secure the Drum Support Bearing
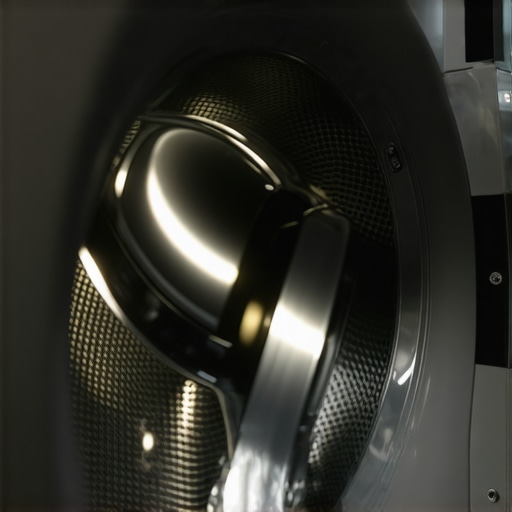
Start by unplugging your washing machine and removing the panels to access the drum. Locate the support bearing, which is usually found at the rear of the drum. Use a wrench to remove the bolts holding it in place. During my own repair, I had to steady the drum with one hand while loosening the support with the other. Once removed, clean the area thoroughly to remove debris and worn lubricant. Replace the bearing if it’s cracked or severely worn, then reassemble carefully. This step ensures the drum stays firmly in position during cycles, preventing rattles and damage.
Inspect and Replace Snubber Rings
The snubber rings cushion the drum and minimize vibrations. To check them, remove the belt and gently lift the drum out enough to see the bottom supports. If the rings appear cracked, brittle, or missing chunks, it’s time for replacements. During my fix, I found my rings were cracked, making the drum wobble. I ordered new rings from the manufacturer, which cost less than five dollars each. Installing new rings is straightforward; snap them into place around the drum’s support points. This restores stability and reduces excess movement, extending your washer’s lifespan.
Adjust the Drum Belt and Pulley System
Loose belts can cause wobbling. To check, remove the front panel or rear access panel, then manually examine the belt connecting the motor to the drum. If it feels loose or slips easily, replace it or tighten the tension. Use a belt tension gauge if available. During my experience, the belt was slightly misaligned, causing noise. I tightened the tension slightly and realigned it with the pulley. Proper belt tension ensures the drum spins smoothly without excessive play, preventing future loosening issues.
Check for Structural Damage
Inspect the shock absorbers, springs, and support pads for signs of wear or damage. Worn shocks or broken springs allow the drum to wobble. During my repair, I noticed a spring was snapped after removing the panels. Replacing these parts restores the machine’s balance. For heavy-duty washers, consider upgrading to sturdier components to handle larger loads without excessive movement.
Test Your Repair
Before reassembling everything, spin the drum manually and then run a short cycle. During testing, I observed minimal movement and no rattling sounds, which confirmed stability. Keep an eye on vibrations and listen for unusual noises. If the wobbling persists, revisit the earlier steps or consult an expert. Properly securing the drum not only improves performance but also prolongs the life of your appliance, making laundry day smooth again.
For more detailed troubleshooting tips on different washer types and capacities, visit these resourceful guides: Top-load or front-load: the gentlest way to wash and how to fix top load washer drainage issues. Proper maintenance and timely repairs keep your laundry routine hassle-free and extend your washer’s lifespan.
False Assumptions About Front Load and Top Load Washers
Many people believe that front load washers are always more gentle on clothes and more energy-efficient than top load models. However, this isn’t necessarily true. In fact, some front loaders can be harsh on delicate fabrics if not properly maintained, especially if mold or detergent buildup occurs. Conversely, top load washers with the right settings can be just as gentle while offering advantages like faster cycle times. To truly understand the differences, it’s important to look beyond marketing claims and focus on the actual features and maintenance requirements. For comprehensive guidance, check out our front load vs. top load comparison.
The Myth of Load Size and Capacity
A common misconception is that larger capacity washers always mean better performance. But overloading a washer, regardless of its capacity, can lead to poor cleaning, increased wear, and even damage to internal components. For example, stuffing a king-size comforter into a machine labeled with a high cubic footage without considering weight distribution can cause the drum to strain or wobble. Instead, focusing on proper load distribution and understanding actual capacity limits — like how many towels or heavy jeans it can handle without issue — results in optimal laundry results. Curious if your washer’s capacity is enough? Read more about capacity testing at is 5.0 cu ft enough.
Spot the Advanced Pitfalls
One sneaky mistake is assuming that all washers handle heavy items like quilts or large blankets equally well. Some owners overestimate their machine’s capabilities, leading to breakages or poor cleaning. For instance, washing multiple king-sized comforters in a machine not rated for heavy loads can overstress the suspension rods or cause unbalanced spins — risking costly repairs. Modern, smart washing machines equipped with sensors can help prevent damage by adjusting cycle parameters automatically, but not all models feature this. To avoid these pitfalls, it’s advisable to consult detailed load limits and maintenance guides, such as are smart washers worth it.
The Surprising Truth About Detergent and Mold
Another overlooked nuance is how improper detergent use and poor maintenance can impair washer performance. Many believe using more detergent yields cleaner clothes, but excess detergent often leads to residue buildup and mold, especially in front load washers. This buildup not only causes unsightly odors but also damages seals and gaskets, complicating repairs. Regular cleaning cycles and using the correct detergent amount—aligned with your machine’s type and load size—are crucial. For cleaning tips, visit the causes of front load tears and how to fix them.
In my experience, understanding these nuances has profoundly enhanced appliance longevity and laundry quality. Remember, it’s not just about choosing the right machine but also mastering its quirks. Have you ever fallen into this trap? Let me know in the comments.
How Do I Maintain My Washer Over Time? Essential Tools for Longevity
Proper maintenance of your washing machine is crucial to ensure it continues to perform efficiently and reliably. I personally rely on a few specialized tools that make this task much easier and more effective. First, I recommend investing in a digital multimeter. This device helps me regularly check the electrical connections and ensure the motor and sensors are functioning correctly. When I noticed my washer was taking longer cycles or showing error codes, a quick multimeter test pinpointed faulty wiring or sensors, saving me a costly service call.
Next, I use a dedicated filter cleaning tool, like a small brush or vacuum attachment, specifically designed for the lint filters and drainage filters. Regularly cleaning these components prevents soap scum buildup and clogs, which can cause drainage issues, such as those detailed in this guide. This simple step extends your washer’s lifespan and keeps water flowing smoothly.
Additionally, I utilize a high-quality ultrasonic cleaner for the detergent dispensers and gasket areas where mold and residue tend to hide. This method disinfects thoroughly, preventing odors and mold growth, which I’ve found to be a common problem in front load washers.
To stay ahead of potential issues, I also periodically run diagnostic modes available on many modern washers. Most smart models include a diagnostic feature accessible via their app or control panel, providing detailed insights into performance metrics and alerting me to upcoming parts needing replacement.
Looking Ahead: The Trend Toward Smart Maintenance
The future of appliance care is moving toward smarter solutions. As I see it, integration of IoT sensors in washers will soon enable predictive diagnostics, alerting homeowners via smartphone apps about potential failures before they happen. This proactive approach could significantly reduce repair costs and downtime, much like what we see emerging in other tech sectors. To prepare, I recommend exploring smart washers with robust diagnostic capabilities, such as those reviewed in this comprehensive comparison.
To get the most from your washer, consider trying my favorite advanced tip: regularly clean the gasket with an ultrasonic cleaner to prevent mold buildup. This small investment in maintenance tools pays off by maintaining peak performance, reducing odors, and avoiding costly repairs down the line.
What I Wish Someone Told Me About Drum Looseness and Washer Maintenance
One of the most impactful lessons I learned is that ignoring small issues like a loose drum can lead to costly repairs down the line. Addressing problems early not only prolongs your washer’s lifespan but also saves money and stress. It took me several hiccups before realizing that routine inspections and timely fixes are essential for reliable laundry days.
My Trusted Tools That Keep My Washer Running Smoothly
Over time, I发现 that investing in quality maintenance tools like a digital multimeter, ultrasonic cleaner, and lint filter brushes has transformed my approach. These tools make diagnoses quicker and repairs more effective, turning what seemed complex into manageable tasks. They’re inexpensive investments that pay off through better washer performance and fewer breakdowns.
Harnessing Emotional Resilience When Facing Home Appliance Challenges
Dealing with washer issues can be frustrating, but embracing a problem-solving mindset keeps me motivated. Each repair teaches patience and confidence, reminding me that with the right knowledge and tools, I can handle most challenges. Don’t let appliance woes dampen your spirit—approach them as opportunities to learn and become more self-reliant.